Brand Design
You can access the Brand editor via the Menu bar by selecting Brand Editor
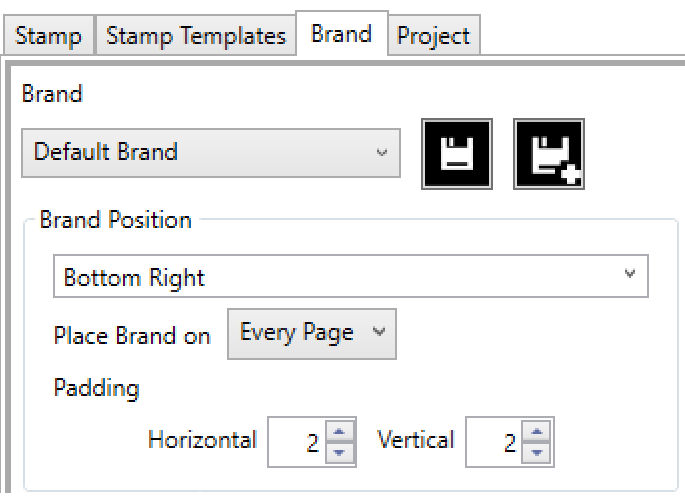
Placement
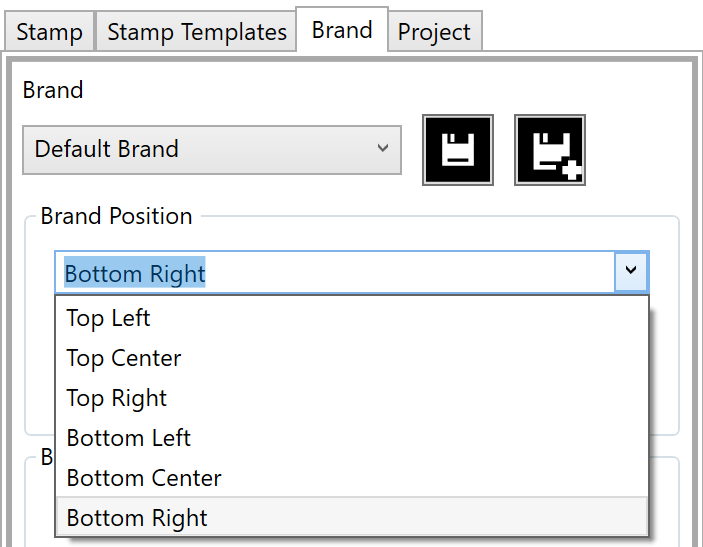
ExhibitMarker™ allows the user to select one of six zones to place the brand when applying to document pages.
| Top Left | Top Center | Top Right |
|---|---|---|
| Bottom Left | Bottom Center | Bottom Right |
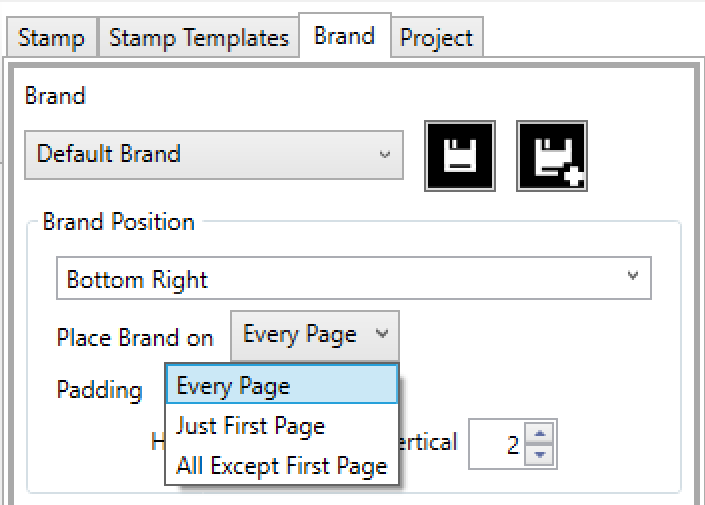
While the Every Page option is generally the method of choice, other options are also available. You may choose to have the brand only appear on the first page of every document, or start on the second page and brand every subsequent page.
ExhibitMarker™ automatically adjusts the text for left or right justification, or centered, depending on the Brand Location selected. There is also an option to increase the horizontal and vertical padding for the brand.
Keywords
The text of the brand has both static and dynamic elements, depending on the keywords that you select during the design phase. There are several stock brands available with the drop-down selection box.
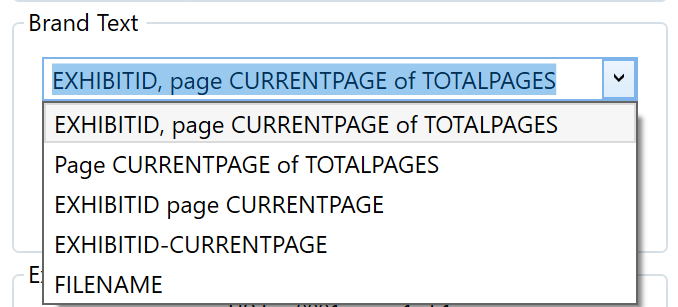
All keywords must appear in ALL-CAPS in order for ExhibitMarker™ to identify and replace the values during the branding process.
- EXHIBITID: Value present for each document in the Exhibit ID field
- CURRENTPAGE: Physical page number of the document that is receiving the brand
- TOTALPAGES: Total number of physical pages in the document
- FILENAME: Original file name value present in the PDF Files list for the document
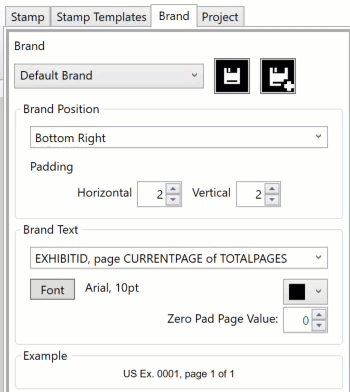
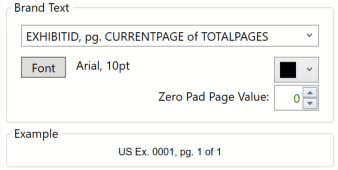
As you change the brand text, the Example section of the Brand design tab will automatically update to reflect the currently selected options.
Additional Formatting
After the text of the brand has been set, you can change the Font, Weight, Size, and Color of the brand.
ExhibitMarker™ automatically adds space to the top or bottom of the page to be branded (based on selected brand position) so that none of the text will overlap anything on the original document. The amount of added space is derived from the height of the brand text, based on the selected font size.
There are instances where the document is oversized, or undersized, and the selected font size will not work well. For each page that is branded, ExhibitMarker™ adjusts the size of the brand for these pages based on a percentage increase or decrease that coincides with the difference of the overall page size from a standard 8.5 x 11 page.
You may also add zero padding to the page number of the brand.
Save Brand Design
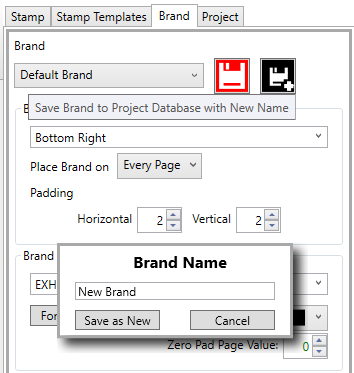
During the design phase, anytime that you alter the design of the brand the Save button changes to red to indicate that the design needs to be saved. When clicked, the currently selected brand design will be overwritten with the new design.
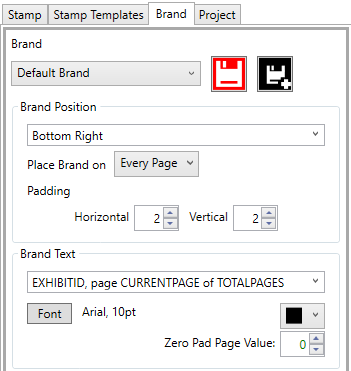
Alternatively, the current brand design can be saved with a new name by clicking the Save As button just to the right of the Save button. This will bring up a dialog box so that you can enter a new brand name, and save the design.